Shift Solenoid: Service and Repair
Shift Solenoid Valve Replacement1. Remove the splash shield.
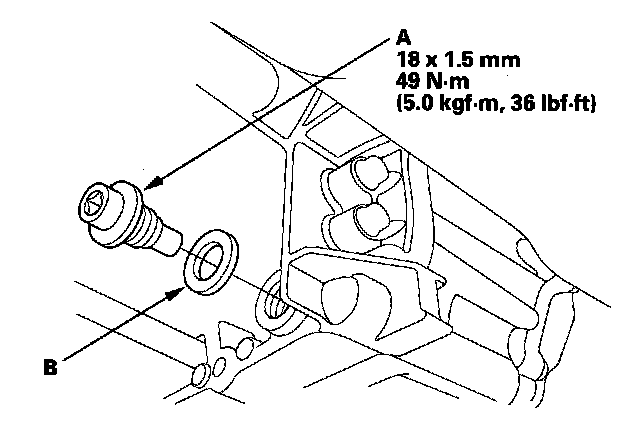
2. Remove the drain plug (A), and drain the Automatic Transmission Fluid (ATF). Then reinstall the drain plug with a new sealing washer (B).
3. Disconnect the battery negative terminal, then disconnect the battery positive terminal.
4. Remove the battery hold-down bracket, then remove the battery cover, battery, and battery tray.
5. Remove the intake air duct and air cleaner housing.
6. Loosen the two bolts securing the battery base from under the vehicle, and remove the two bolts securing the battery base in the engine compartment, then remove the battery base.
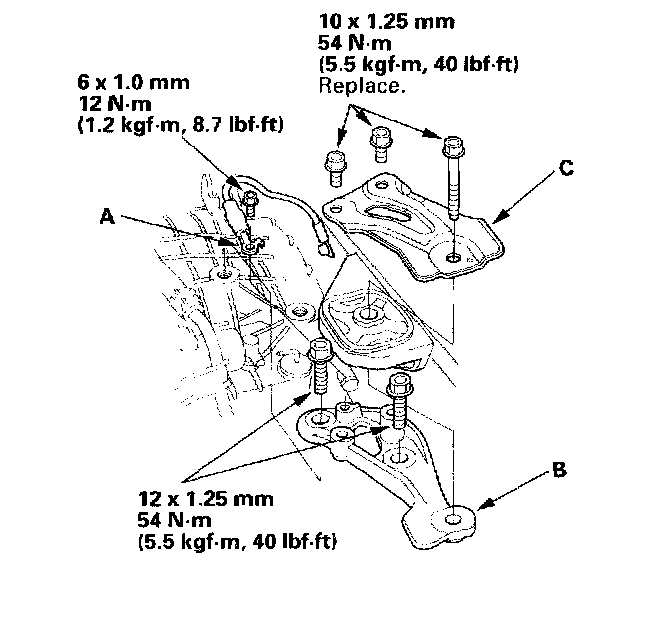
7. Remove the ground cable (A), transmission upper mount bracket (B), and bracket plate (C).
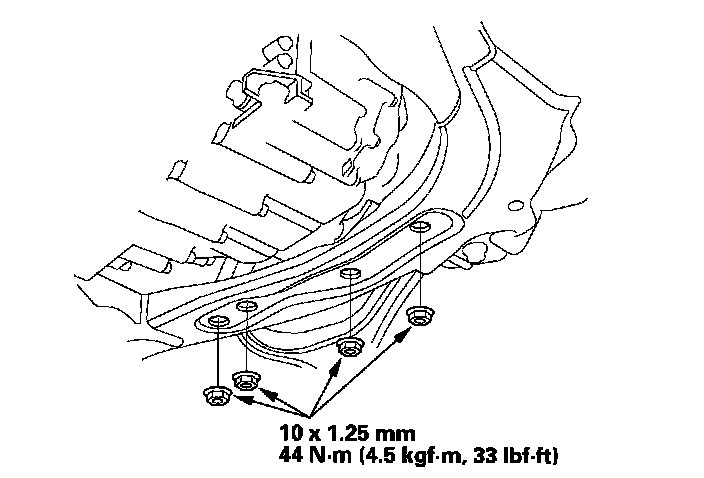
8. Place the transmission jack under the transmission, and remove the transmission lower mount nuts.
9. Lift the transmission up to create clearance between the transmission and front subframe with the jack.

10. Remove the ATF dipstick, and remove the bolts securing the ATF cooler inlet line brackets (A) and ATF dipstick guide pipe (B) from the transmission hanger (C).
11. Remove the harness clamp (D), then remove the ATF dipstick guide pipe.
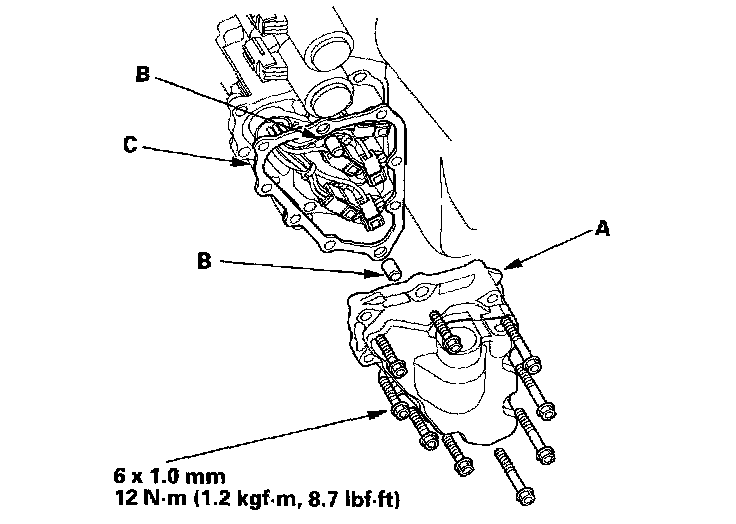
12. Remove the shift solenoid valve cover (A), dowel pins (B), and gasket (C).

13. Disconnect the shift solenoid valve connectors, remove the solenoid mounting bolts (H), then hold the solenoid valve body and remove the shift solenoid valves. Do not hold the connector to remove the shift solenoid valve.
14. Install the new O-rings (two O-rings per solenoid valve) (F) on the replacement solenoid valve.
15. Install the shift solenoid valves C, D, and E. While holding the shift solenoid valve body, be sure to install the solenoid valves until their mounting brackets contact the servo body.
16. Install the shift solenoid valves A and B. While holding the shift solenoid valve body, be sure to install the solenoid valves until their mounting brackets contact the bracket of the installed solenoid. Install the solenoid mounting bolts (H) and tighten them.
NOTE: Do not install the solenoid valves A and B before installing the shift solenoid valves D and E. If solenoid valves A and B are installed before solenoid valves D and E, it may damage the hydraulic control system.
17. Connect the shift solenoid valve D connector (G) with the ATF temperature sensor.
18. Connect the solenoid valve A connector (BLU wire), solenoid valve B connector (ORN wire), solenoid valve C connector (GRN wire), and solenoid valve E connector (RED wire).
19. Install the shift solenoid valve cover, dowel pins and a new gasket.
20. Install the new O-ring on the ATF dipstick guide pipe, and install the ATF dipstick guide pipe, then install the harness clamp on the ATF dipstick guide pipe.
21. Secure the ATF cooler line brackets on the transmission hanger with the bolts.
22. Install the transmission lower mount nuts.
23. Install the transmission upper mount bracket, bracket plate, and ground cable, then remove the transmission jack.
24. Refill the transmission with ATF.
25. Install the battery base, then install the air cleaner housing and intake air duct.
26. Install the battery tray, battery, and battery cover, then secure the battery with its hold-down bracket. Connect the battery terminals.
27. Install the splash shield.