Front Suspension

Damper/Spring Replacement
Removal
1. Raise the front of the vehicle, and support it with safety stands in the proper locations.
2. Remove the front wheel.
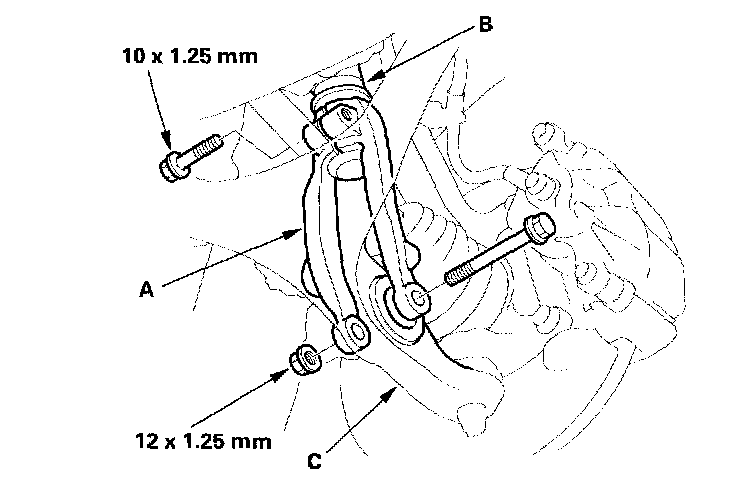
3. Remove the damper fork (A) from the damper (B) and lower arm (C).
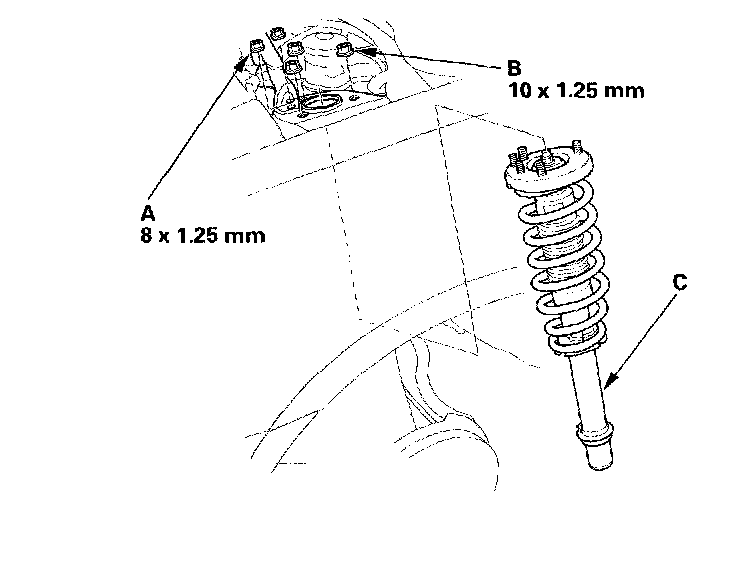
4. Remove the two 8 mm flange nuts (A) and three 10 mm flange nuts (B) from the top of the damper, and remove the damper assembly (C) .
Disassembly/Inspection
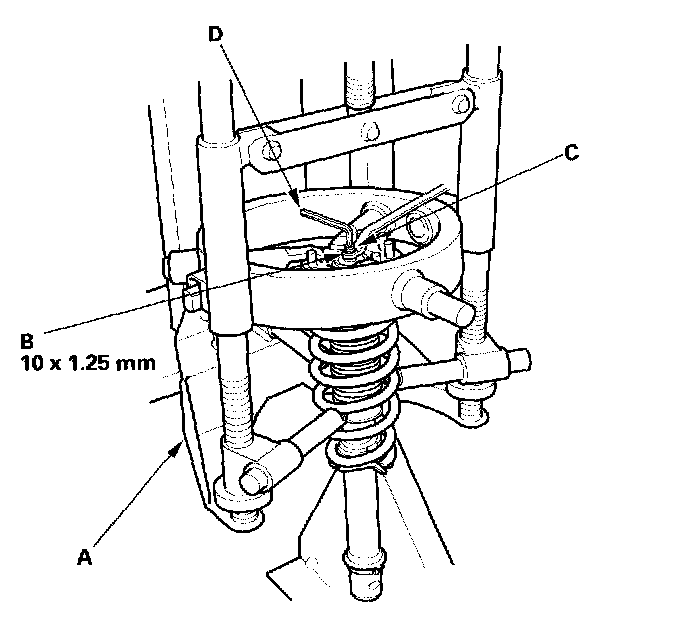
1. Compress the damper spring with the commercially-available strut spring compressor (A) according to the manufacturer's instructions then remove the self-locking nut (B) while holding the damper shaft (C) with a hex wrench (D). Do not compress the spring more than necessary to remove the nut.
2. Release the pressure from the strut spring compressor, then disassemble the damper as shown in the Exploded View.
3. Reassemble all the parts, except for the spring mounting cushion and spring.
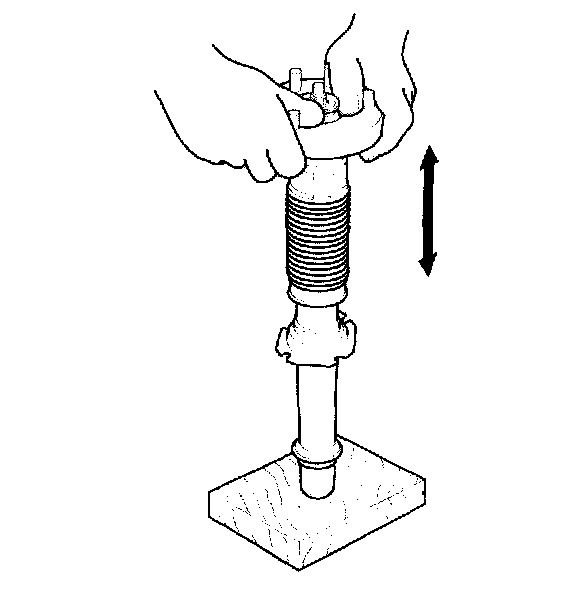
4. Compress the damper assembly by hand, and check for smooth operation through a full stroke, both compression and extension. The damper should extend smoothly and constantly when compression is released. If it does not, the gas is leaking and the damper should be replaced.
5. Check for oil leaks, abnormal noises, and binding during these tests.
Reassembly
NOTE: Refer to the Exploded View as needed.
1. Assemble the damper disassembled parts except for the washer and self-locking nut.
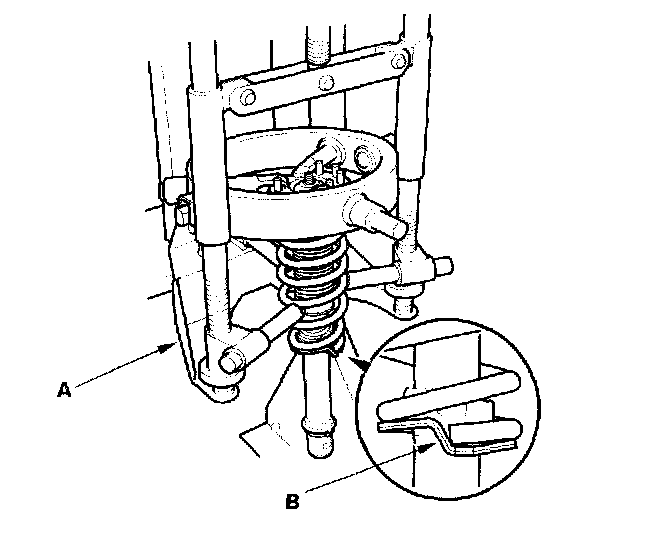
2. Install the damper assembly on the commercially available strut spring compressor (A), and compress the spring lightly.
3. Align the bottom of the spring and the stepped part (B) of the lower spring seat.
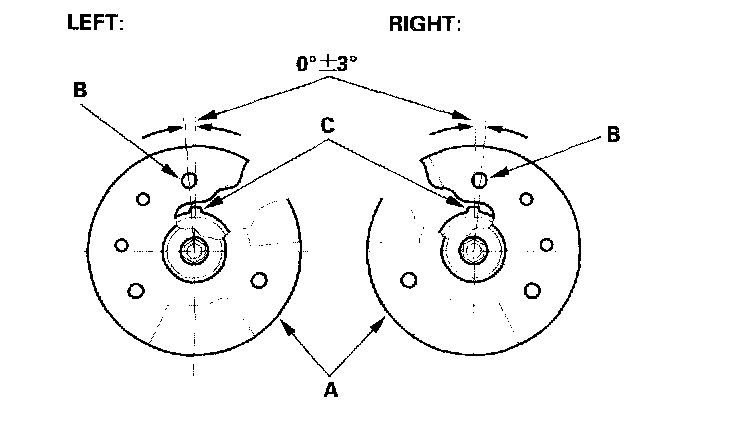
4. Position the damper mounting base (A) so the stud bolt (B) in it is aligned with the aligning tab (C) in the damper unit.
5. Compress the damper spring. Do not compress the spring excessively.
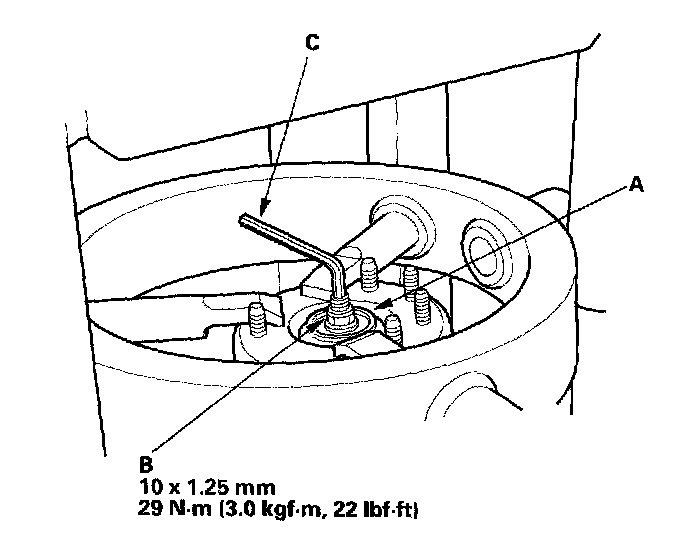
6. Install the washer (A) and a new 10 mm self-locking nut (B). Hold the damper shaft with a hex wench (C), and tighten the 10 mm self-locking nut to the specified torque.
7. Remove the damper assembly from the strut spring compressor.
Installation
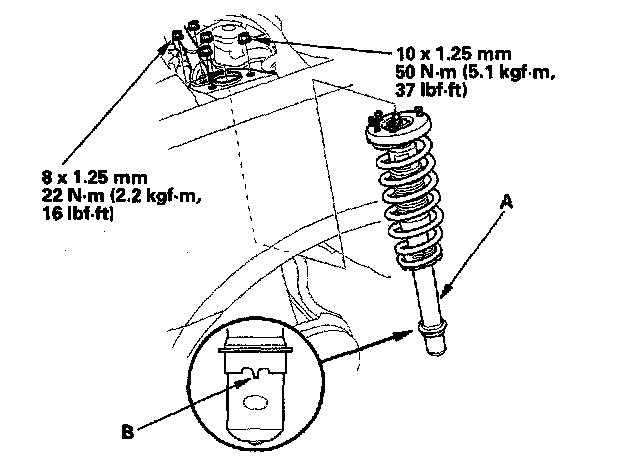
1. Position the damper assembly (A) in the body with the aligning tab (B) facing inside, then loosely install the flange nuts.
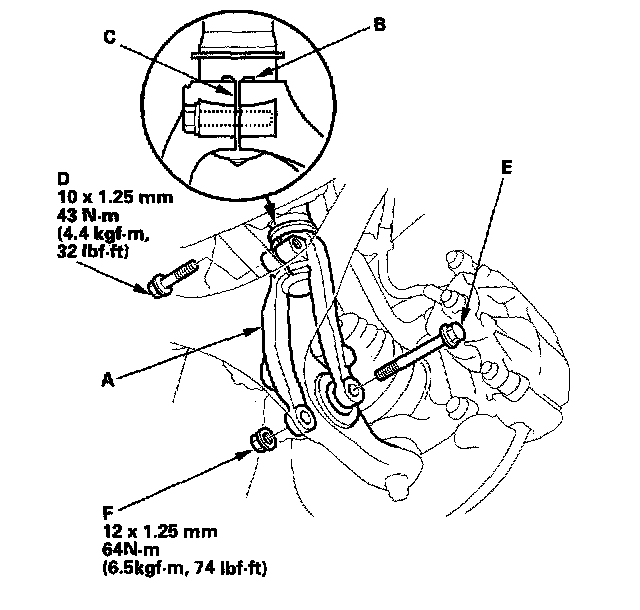
2. Install the damper fork (A) over the driveshaft and onto the lower arm. Install the front damper in the damper fork so the aligning tab (B) is aligned with the slot (C) in the damper fork.
3. Loosely install the damper pinch bolt (D) into the damper fork.
4. Install the flange bolt (E) to the damper fork and lower arm, and lightly tighten the new damper fork mounting nut (F).
NOTE: Use a new damper fork mounting nut on reassembly.
5. Place the floor jack under the lower arm, and raise the suspension to load it with the vehicle's weight.
6. Tighten the flange nuts on the top of the damper to the specified torque.
7. Tighten the damper pinch bolts to the specified torque.
8. Tighten the flange nut on the damper fork to the specified torque.
9. Clean the mating surface of the brake disc and the inside of the wheel, then install the front wheel.