Dashboard Upper Panel
Dashboard Upper Panel Removal/ InstallationSRS components are located in this area. Review the SRS component locations and the precautions and procedures before performing repairs or service.
NOTE: Put on gloves to protect your hands.
1. Remove the dashboard/steering hanger beam.
2. Remove the these items from the dashboard:
- Gauge control module
- Audio-HVAC-display module
- Dashboard side vent, both sides
- Tweeter, both sides
- Sunlight sensor.

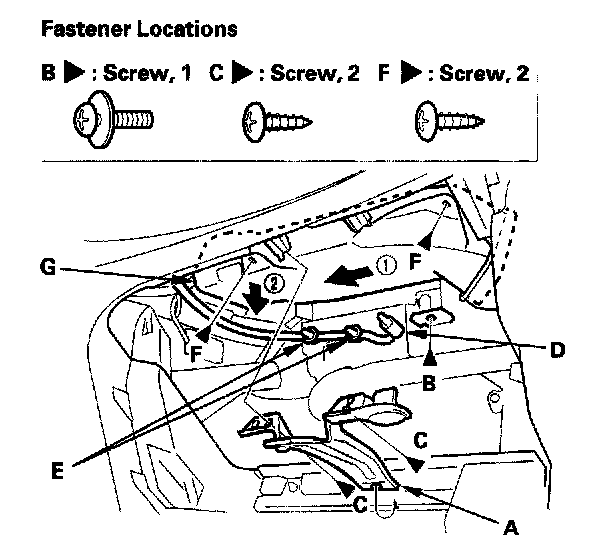
3. Remove the glove box striker (A).
1. Remove the screws (B, C), then remove the glove box striker.
2. Disconnect the glove box light bulb socket (D) and detach the harness clips (E) from glove box striker.
4. Remove the screws (F), slide the passenger's A/C duct (G) inside, then lower the duct to remove it.
5. Remove the passenger's airbag.

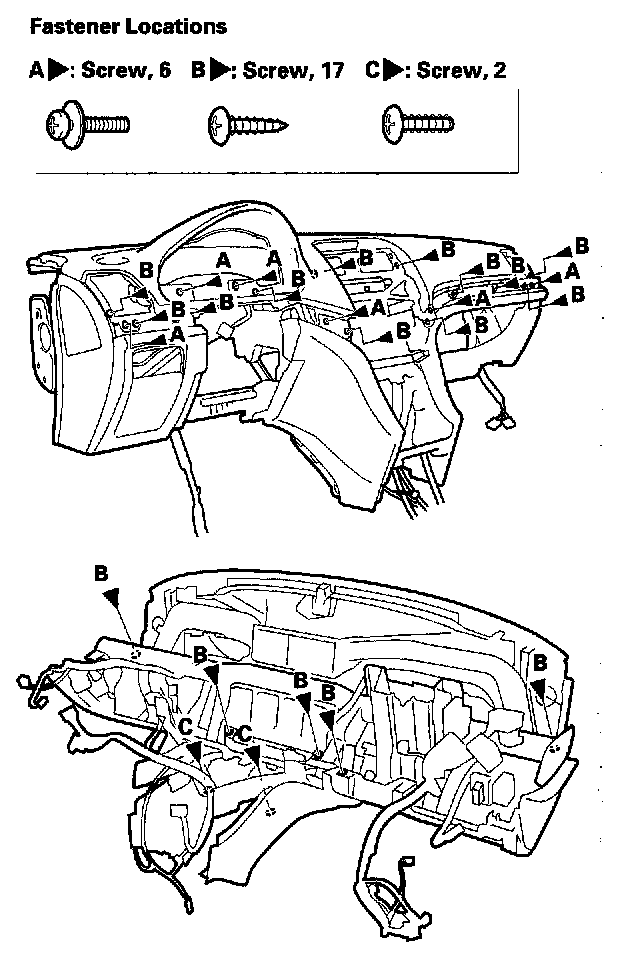
6. Remove the screws (A, B, C).
NOTE: Some screws and bolts may be difficult to see because they are hidden behind wire harnesses. If the cover dose not come off easily, look for a screw or bolt that you might have missed.

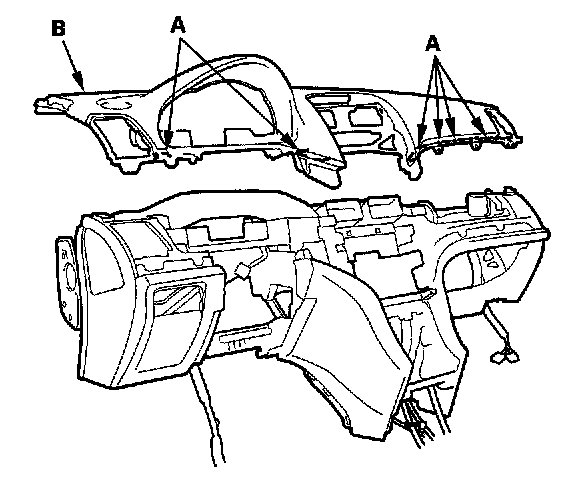
7. Release the hooks (A), then remove the upper panel (B).

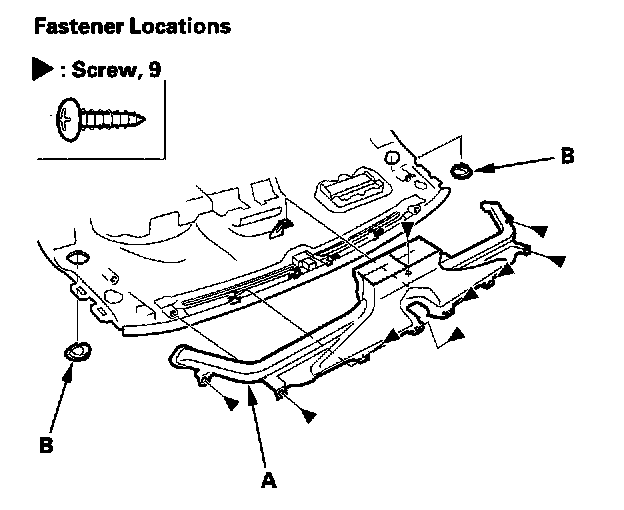
8. Remove the screws, then remove the front vent duct (A) and side defogger vent trim (B).
9. Install the upper panel in the reverse order of removal.