Brake Master Cylinder: Service and Repair
Master Cylinder Replacement
NOTE:
- Do not spill brake fluid on the vehicle; it may damage the paint; if brake fluid does contact the paint, wash it off immediately with water.
- To prevent dripping brake fluid, cover disconnected hose joints with rage or shop towels.
- Clean all parts in brake fluid and air dry; blow out all passages with compressed air.
- Before reassembling, check that all parts are free of dirt and other foreign particles.
- Replace parts with new ones as specified in the illustration.
- Make sure no dirt or other foreign matter gets in the brake fluid,
- Make sure no grease or oil gets on the brake discs or pads.
- When reusing pads, always reinstal them in their original positions to prevent loss of braking efficiency.
- Do no reuse drained brake fluid
- Always use Honda DOT 3 brake fluid, Non-Honda brake fluid can cause corrosion and shorten the life of the system.
- Do no mix different brands of brake fluid as they may not be compatible.
- Coat the piston, piston seal groove, and caliper bore with clean brake fluid.
- Replace all rubber parts with new ones when ever disassembled,
- After installing the caliper, check the brake hose and line for leaks, interference, and twisting.

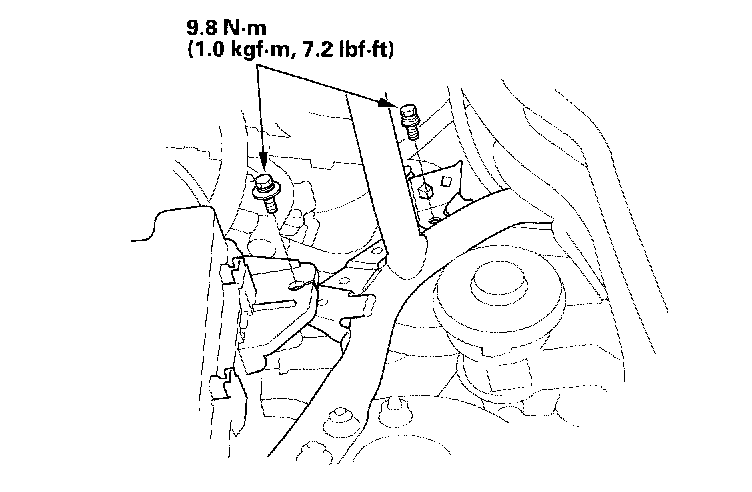
1. Remove the cable clamps from the body.

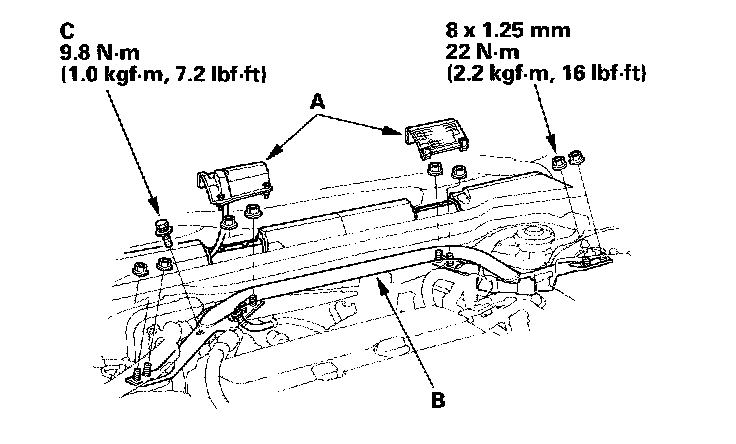
2. Remove the access panel (A), then remove the strut brace (B).
3. Remove the accelerator position sensor mounting bolt (C) from the strut brace.
4. Remove the reservoir cap and brake fluid from the master cylinder reservoir.

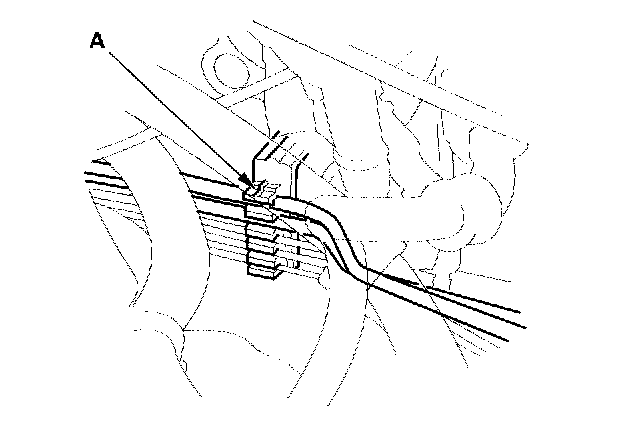
5. Remove the primary and secondary brake lines from the hose clamp (A).

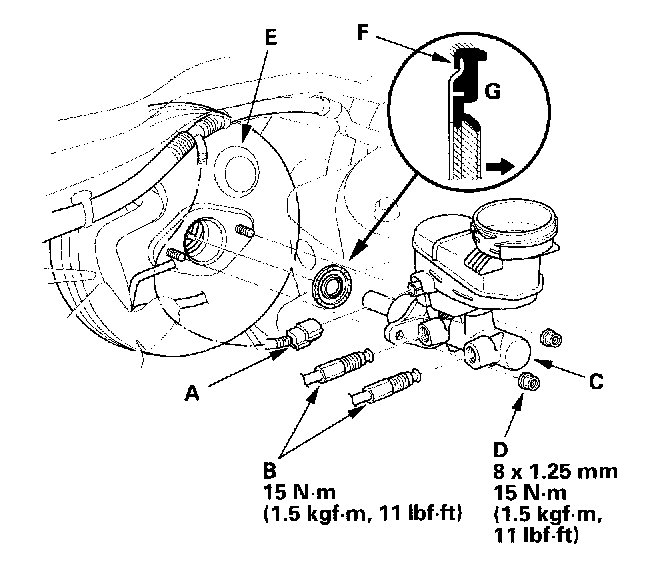
6. Disconnect the brake fluid level switch connector (A).
7. Disconnect the brake lines (B) from the master cylinder (C). To prevent spills, cover the hose joints with rags or shop towels.
8. Remove the master cylinder mounting nuts (D) and washers.
9. Remove the master cylinder from the brake booster (E). Be careful not to bend or damage the brake lines when removing the master cylinder.
10. Remove the rod seal (F) from the master cylinder.
11. Install the master cylinder in the reverse order of removal, and note these items:
^ Replace all the rubber parts with new ones whenever the master cylinder is removed.
^ Use a new rod seal on reassembly.
^ Coat the inner bore lip and outer circumference of the new rod seal with the recommended seal grease in the master cylinder set.
^ Install the rod seal onto the master cylinder with its grooved side (G) toward the master cylinder.
^ Check the brake pedal height and free play after installing the master cylinder, and adjust it if necessary.