Overhaul
Dashboard/Steering Hanger Beam Disassembly/ReassemblyNOTE: Put on gloves to protect your hands.
1. Remove the dashboard/steering hanger beam.
2. Remove the these items from the dashboard:
- Driver's outer dashboard trim.
- Gauge control module.
- Audio-HVAC-display module.
- Glove box damper.
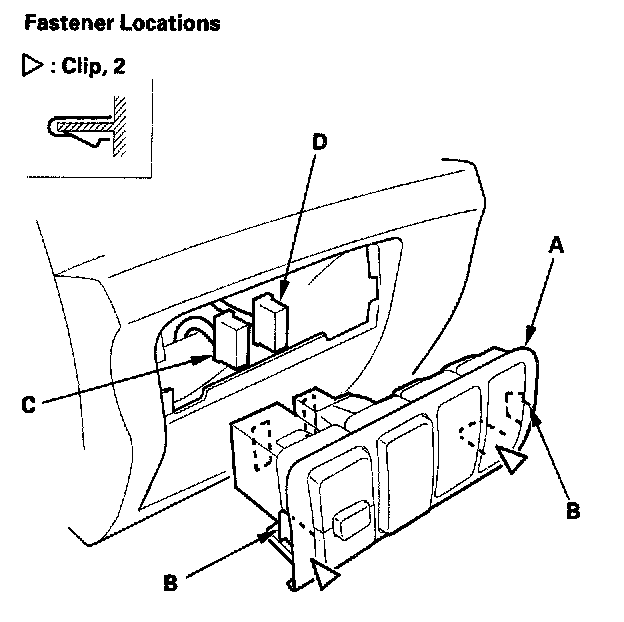
3. Pull out the switch panel (A) to release the clips, hooks (B) and disconnect the moonroof switch connector (C) and VSA off switch connector (D).
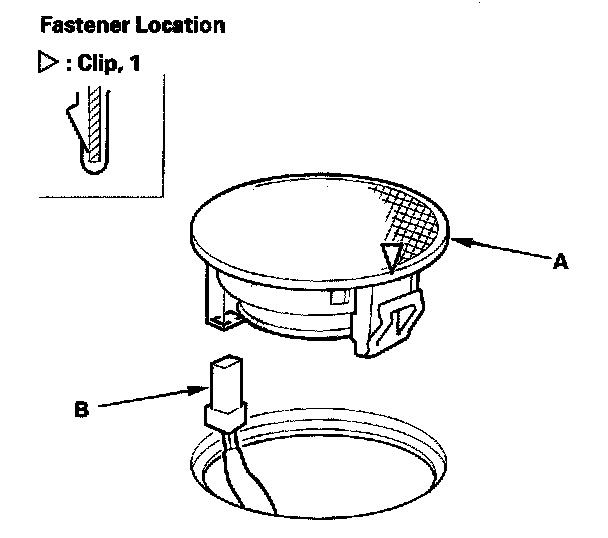
4. On both side, detach the dip, then remove the tweeters (A). Disconnect the tweeter connectors (B).
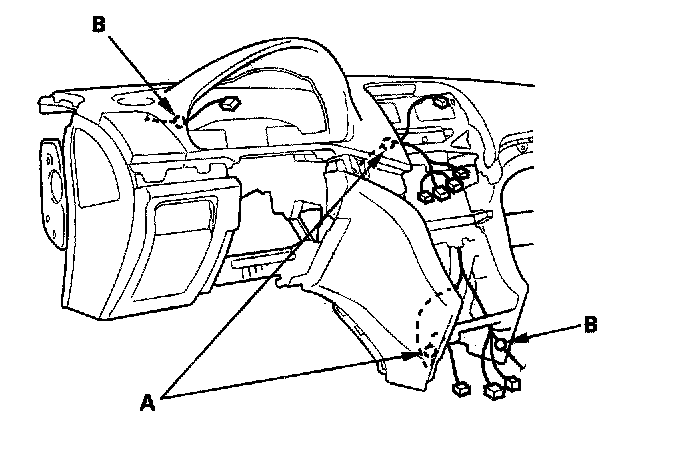
5. From the front of the dashboard, detach the harness clips (A, B).
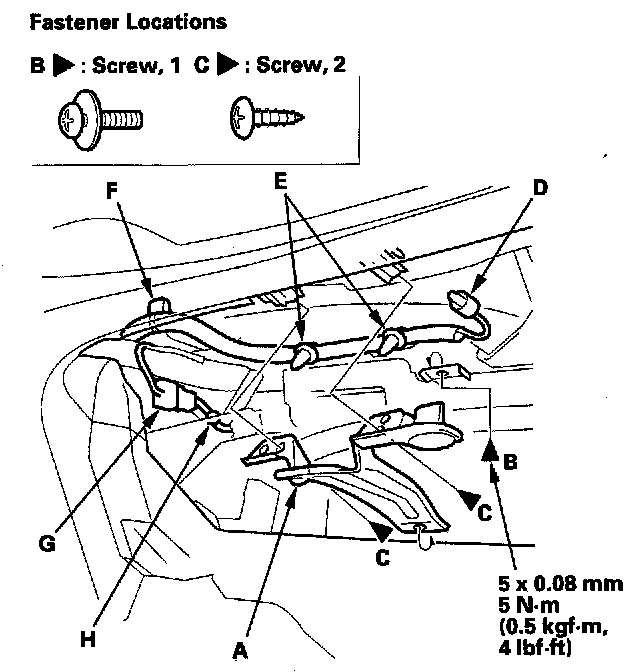
6. Remove the glove box striker (A).
1. Remove the screws (B, C) securing the glove box striker.
2. Disconnect the glove box light bulb socket (D), and detach the harness clips (E, F) from the glove box striker.
7. Disconnect the passenger's airbag connector (G), and detach the harness clip (H).
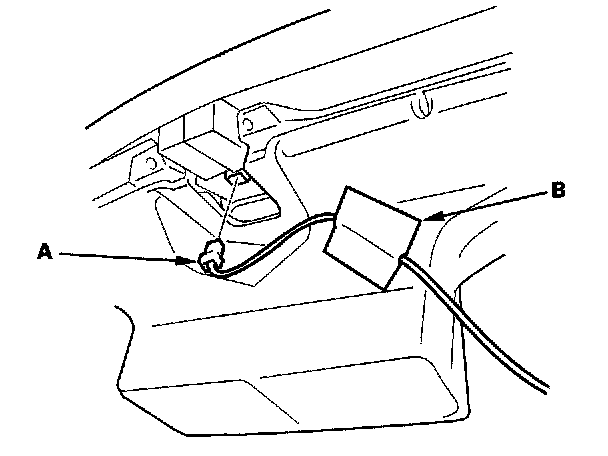
8. From the back of the dashboard. Disconnect the sunlight sensor connector (A) and peel the cushion tape (B).
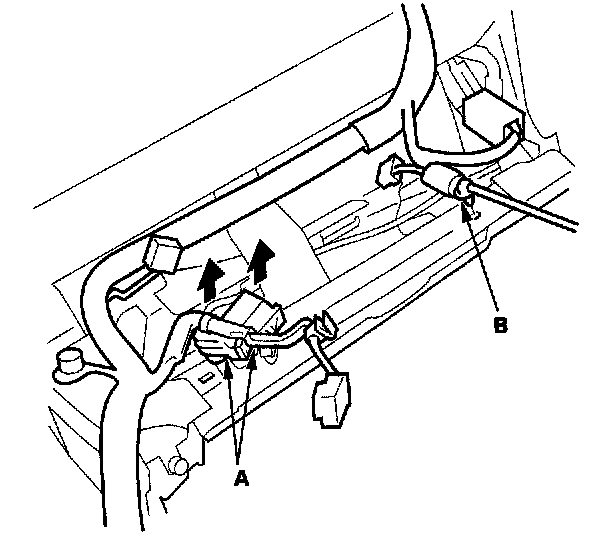
9. From the back of the dashboard, detach the connectors (A) and harness clip (B) on passenger's side.
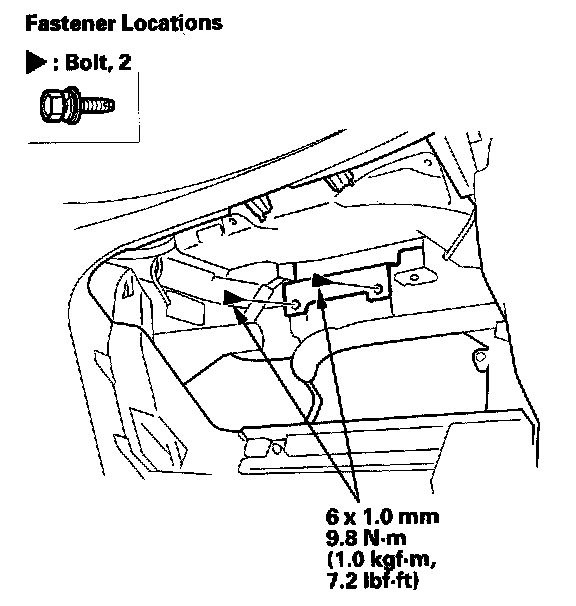
10. Remove the bolts securing the passenger's airbag. Fastener Locations
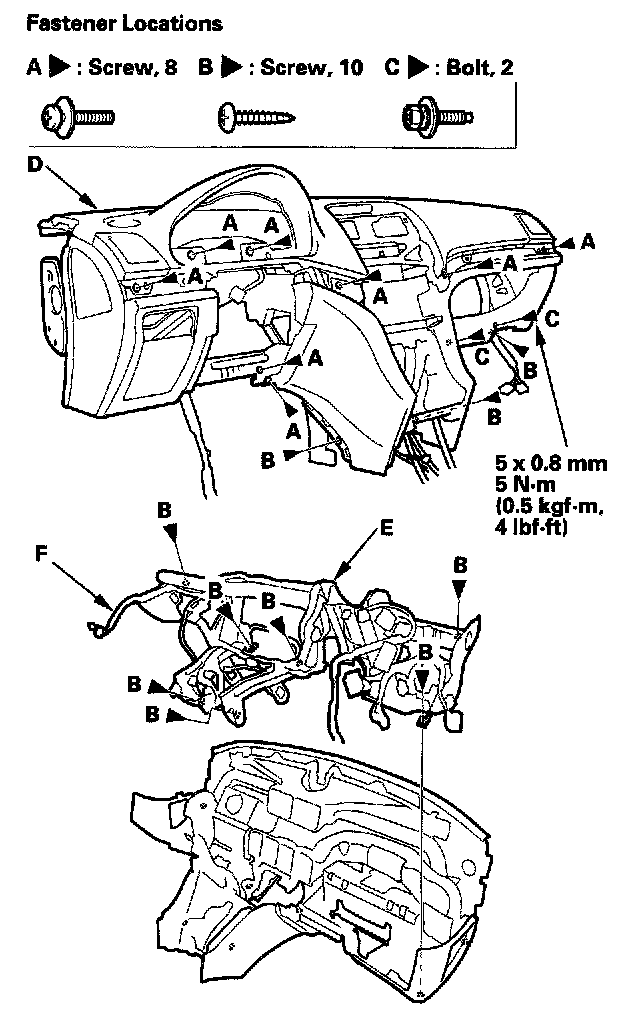
11. Remove the screws (A, B) and bolts (C) securing the dashboard (D) and steering hanger beam (E), then separate them.
NOTE: Some screws and bolts may be difficult to see because they are hidden behind wire harnesses. If the cover does not come off easily, look for a screw or bolt that you might have missed.
12. Disassemble the beam in the reverse order of reassembly, and note these items:
- Make sure the dashboard wire harness (F) is not pinched.
- Make sure the connectors are plugged in properly.